A while back my flat-mate’s laptop hard drive keeled over and died. It wouldn’t boot and wouldn’t read in a caddy, and as there was no back of the data, it was all lost too. Only one thing for it then, buy and install a brand new hard disk.
In this tutorial, I will show you how to physically replace the hard disk, I won’t be showing you how to install windows now and there are many other blogs that cover that.
Hopefully this will give you the confidence to go ahead and replace a disk is you need to.
.
Problem
.
How to replace hard disk (sata)
.
Solution
- First of all you will need to switch off the laptop, and remove the power connection.
- Now turn the laptop over and remove the battery.
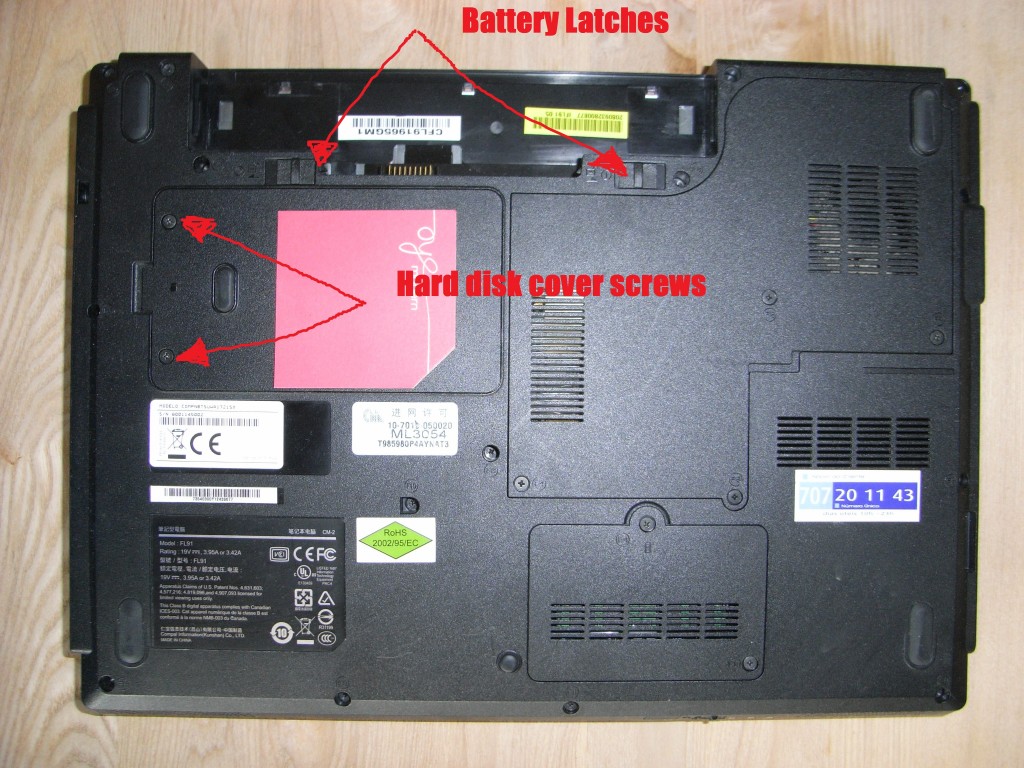
- You should now see something like this:
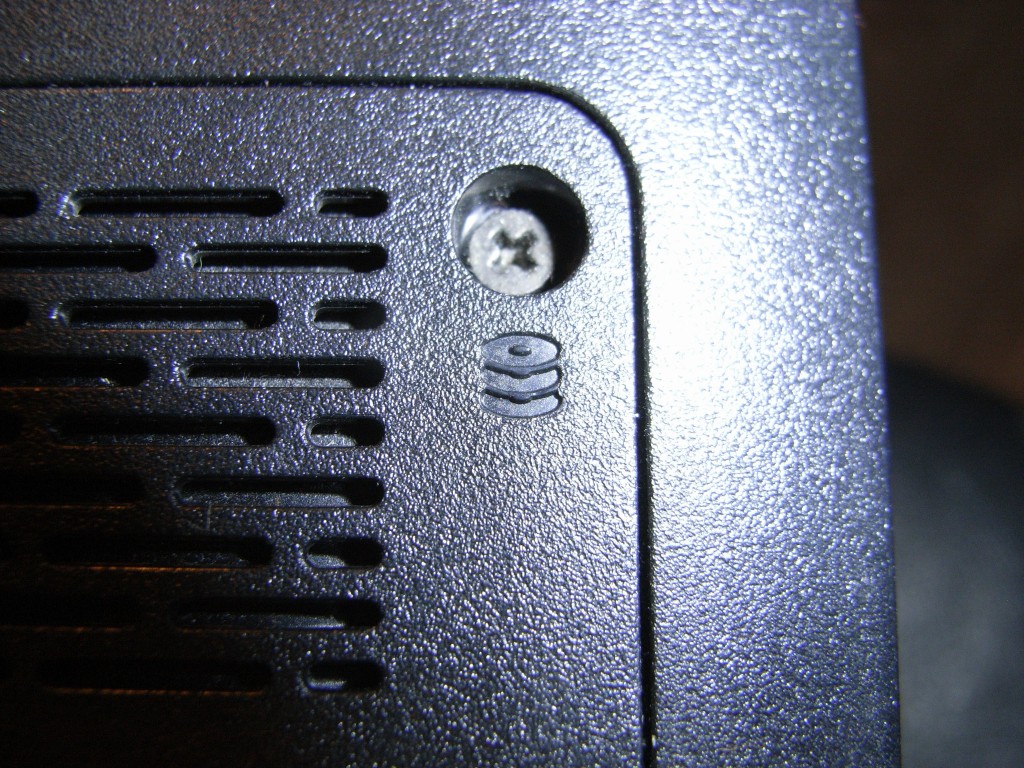
- You should be able to locate the hard disk cover it usually has a symbol on it that looks like this:
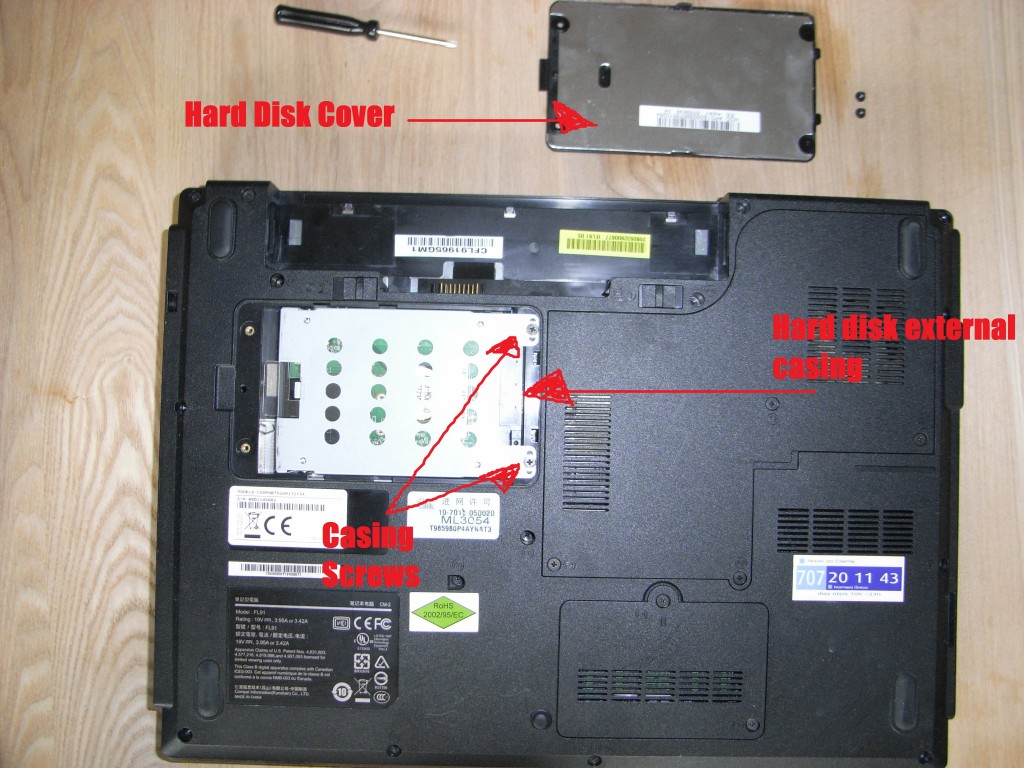
- Near the symbol(s) you should find the hard disk cover screws remove them and you will see something like this:
- In this case the hard disk is housed in some casing, the screws keeping it attached to the laptop case need removing and then you can slide the hard disk out.
-
Next you need to remove the casing screws on the hard disk.
- Finally the hard disk has been removed from it’s casing.
- All that remains is to place the new hard disk back into the casing and reverse the whole process!
Please note hard disks and other computer parts are static-sensitive, meaning you should ensure you discarge any staic you have. You can do this by touching something metal, before you start this will remove any static build up.


