So I was working on an old PC, (Motherboard: PC CHIPS m860 V1.0) trying to update the BIOS (Basic input/output system) with the manufacturers supplied software. However it failed and the net result was a corrupted bios. This meant that the computer couldn’t boot and also I couldn’t get into the BIOS setup.
Interestingly when a computer boots up, if it is failing on boot it will emit a few beeps to tell you what the problem is. As my bios was American Megatrends I searched for what the beeps meant. For a full list see:
http://www.ami.com/support/doc/AMIBIOS8_Checkpoint_and_Beep_Code_List_PUB.pdf
If that doesn’t help here are a few suggestions on what to do if your bios stops working:
1. Clear the CMOS.
The CMOS (Complementary metal–oxide–semiconductor) is the temporary stored settings for the BIOS, and the it can be reset to the the default settings. This will clear things such as time and date and BIOS passwords. This can be done 2 ways first is by using the CMOS jumper:
- Turn off your PC and unplug it
- Find the CMOS jumper on the motherboard it is usually located near the battery, it is usually labeled CLR, CLEAR, CMOS etc.
- There are 3 pins for the CMOS jumper, simply remove the jumper and place it one across so it now covers the center pin and the opposite pin.
- Leave it for 10 seconds. Then put it back to its original position.
- CMOS should now be cleared.
The second method is by removing the CMOS battery. It will do the same thing as the removing the jumper.
- Turn off your PC and unplug it
- Find the CMOS Battery
- Remove the battery
- Leave it for 10 seconds. Then put it back to its original position.
- CMOS should now be cleared.
2. Try to restore the BIOS to its original state using a backup copy
After some research it became apparent that companies had thought of the issue of a corrupt BIOS. So here are a few methods you could try if your motherboard is American Megatrends:
Recovery from floppy:
- Go to the motherboard manufacturers website and download a copy of the BIOS usually named xxxx.BIOS
- Rename the file AMIBOOT.ROM
- Copy the file to a floppy disk
- Insert the floppy into the affected machine
- Hold down <CTRL> and <Home> keys and switch on. Release the keys once the floppy light comes on.
- After the floppy is read you should hear some beeps (usually 4), once they have finished it means the BIOS has been recovered. There may also be a progress dialog shown
- The computer may restart by itself. If not manually restart.
Recovery from USB:
- This is the same as the floppy method except using a USB stick, not all motherboards support this
Recovery from IDE CD-ROM
- This is the same as the floppy method except using a CD, not all motherboards support this
Read more about these methods:
http://www.rom.by/files/AMIBIOS8-Flash-Recovery-Whitepaper.pdf
http://www.supermicro.com/manuals/other/AMI_BIOS_Recovery.pdf
Neither of these methods worked for me, so there was one final option:
3. Buy a replacement BIOS chip.
After some searching I found this website: http://www.bios-service-center.com/ . It specializes in replacement BIOS chips. So now all I needed to do was order the replacement. The PC chips M860 motherboard was listed on the site, so I ordered the chip required, and it was only £10 inc delivery. Bargain.
The next day I received an e-mail asking me for the exact BIOS serial number. So for this I had to located the BIOS chip and read the serial printed on it.
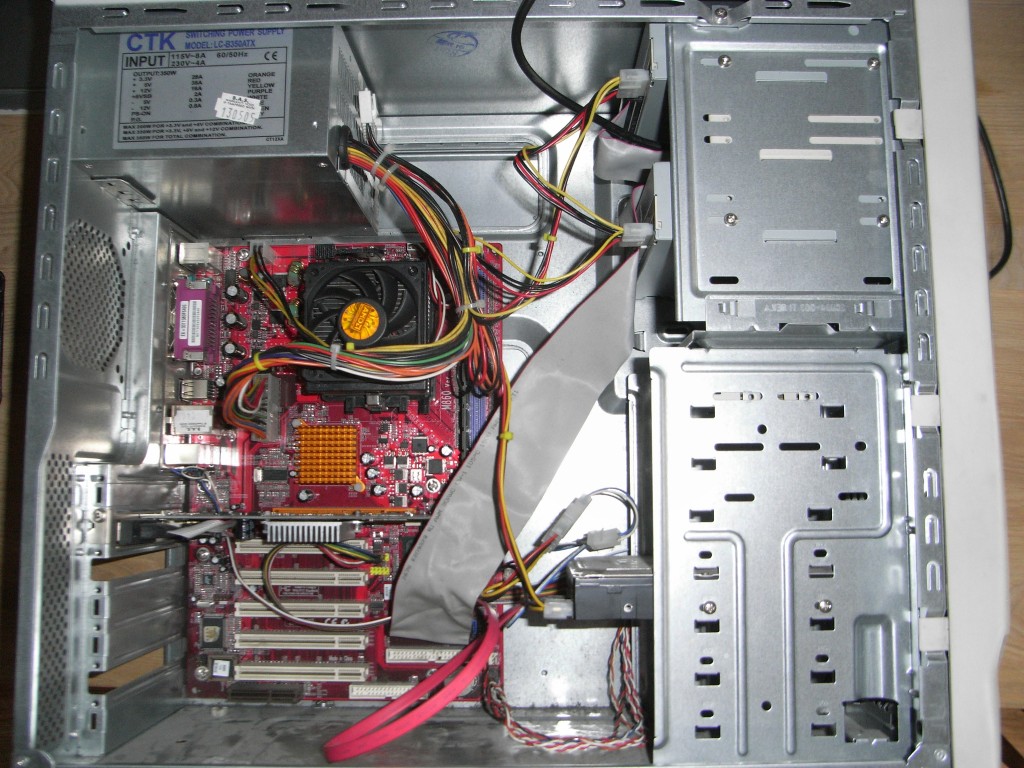
Here is a picture of the whole motherboard:
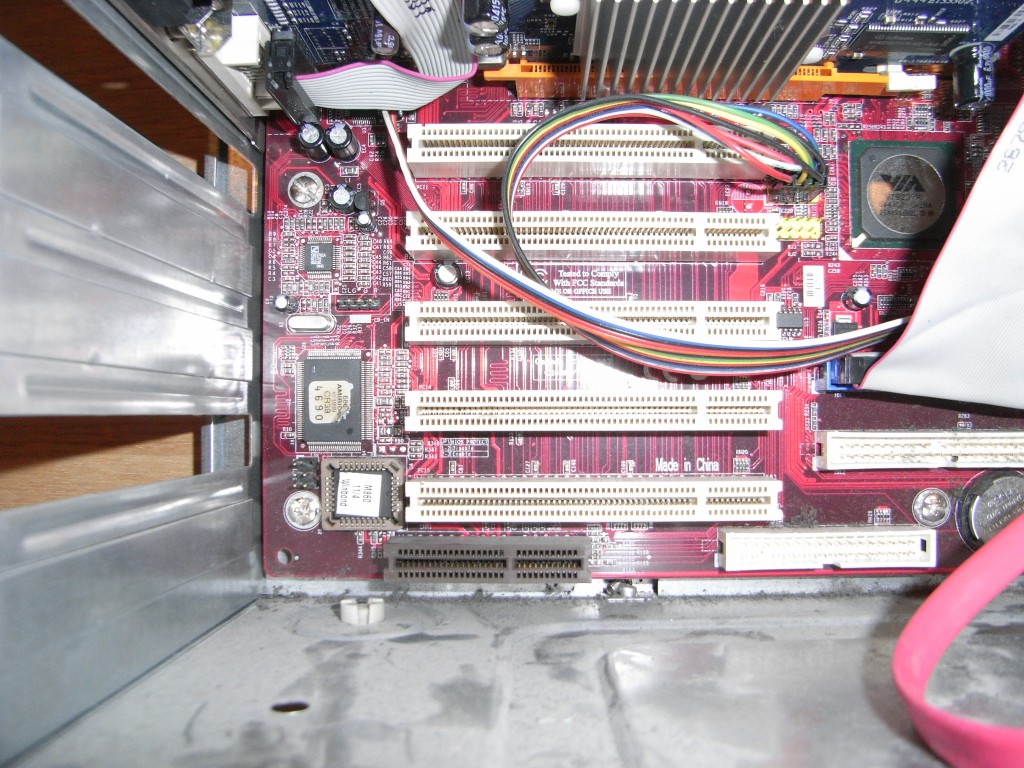
The BIOS chip is located bottom left of this picture. Here is a close up:
Here we can see the chip clearly in the bottom left corner (with the sticker stuck on wonky)
So after locating the BIOS chip I needed to remove it, now there are some special tools to remove BIOS chips, but I used a bent paper clip to hook it out (it was corrupted anyway). Please note you must turn the computer off and remove the CMOS battery BEFORE you remove the BIOS chip.
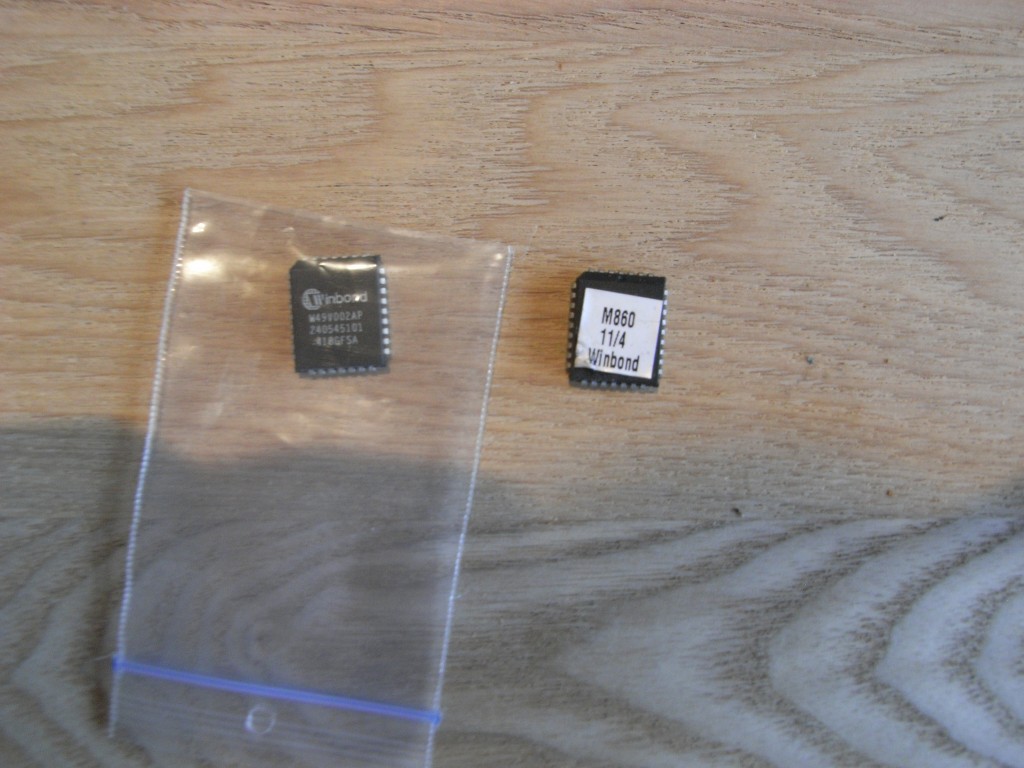
Once removed I peeled off the sticker to reveal the serial number and e-mailed the details over the the BIOS replacement website.
Within a few days the BIOS chip arrived, all the way from the Netherlands!
After installing the new BIOS chip the computer worked perfectly again.


