How to get DOOM 3 to run in custom resolution (1920 x 1080)

Earlier this year I dusted of my copy of DOOM 3, remembering the nice graphics, but when I installed it the game didn’t support my graphics mode (1920 x 1080) So I tracked down a way to edit the custom mode so it would work.

Problem:

Doom not running in correct resolution

Solution:

Find the “DoomConfig.cfg” file found usually in:  C:\Program Files (x86)\DOOM 3\base.

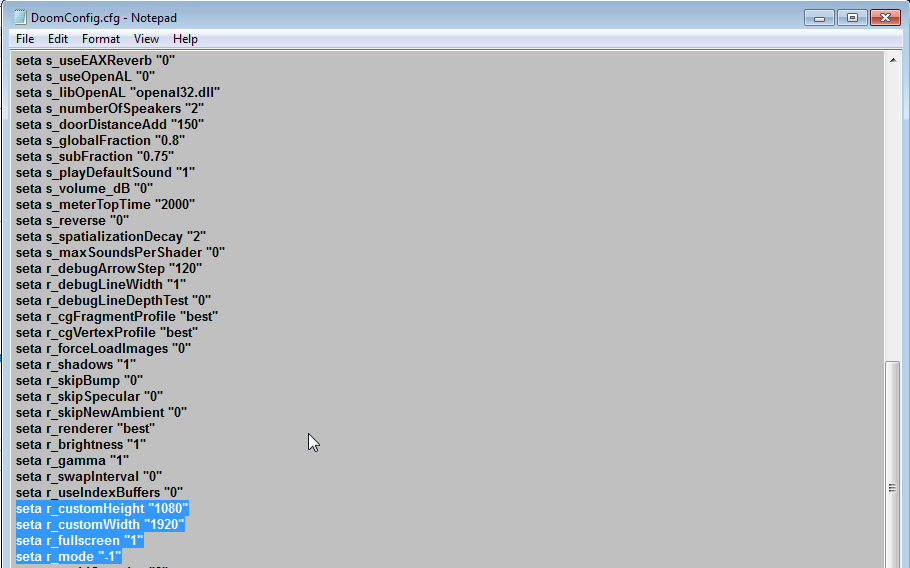
Open the file and edit the following entires:

  • r_mode
  • r_customHeight
  • r_customWidth
  • r_aspectratio

And modify them as follows:

  • r_mode -1 – means putting into custom mode
  • r_customHeight 1080 – means custom resolution height
  • r_customWidth 1920 – means custom resolution width
  • r_aspectratio 1 – this changes the aspect ratio 0 is for a 4:3 display, 1 a 16:9 display (widescreen) and 2 a 16:10 display

They should look like this in the config file:

Doom config file

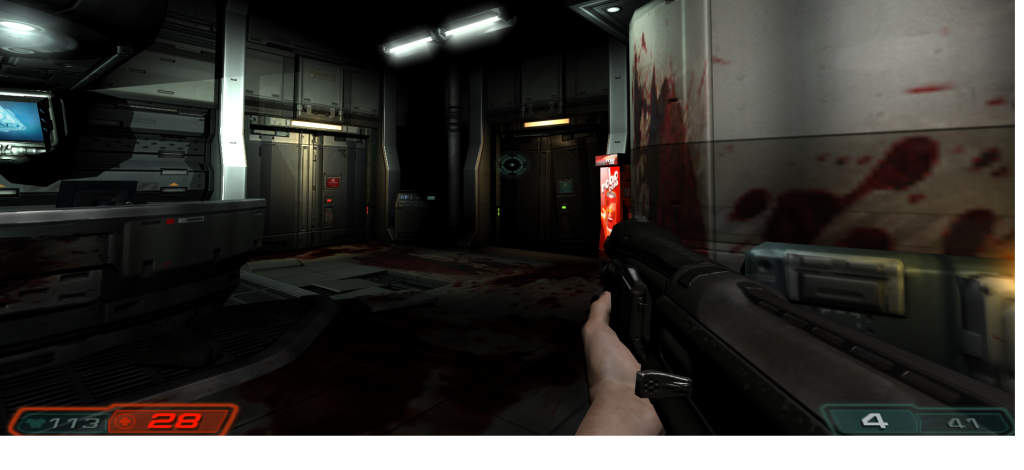
The aspect ratio is found near the bottom of the file. Then you can enjoy graphics like this:

Lovely jubbly!

For further reading on tweaking DOOM 3 I recommend:

http://www.techspot.com/tweaks/doom3/

Please note: If you change anything in the graphics options in game, then the custom settings will be lost and you will have to re-edit the cfg file.

Posted in How to guides | 3 Comments

How to fix blue screen of death (BSOD) related to ATI HD Series cards

As I mentioned previously I have been trying to catalogue problem both past and present I have had on this Blog. As some will know I have a ATI HD 5770. It caused me 2 issues, 1 screen flicker but the second was random BSODs.

The BSOD problem was caused by the ATI HD (High definition) or HDMI Audio driver that is installed by default with the catalyst suite with comes with ATI graphics cards.

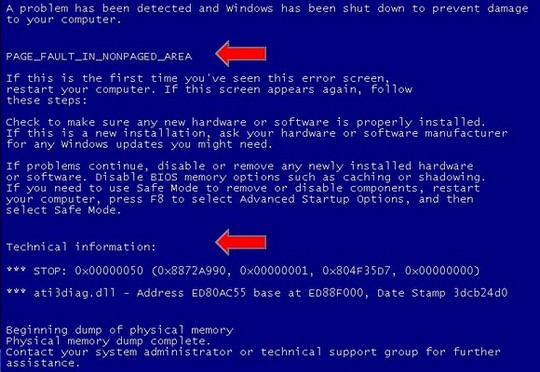
Here is an example of BSOD:

The arrows indicate where problems area lie

I think the issue has been resolved by ATI/Microsoft now, and the catalyst version I use (11.7) works fine. But in case people have this problem there are 2 ways to fix this problem:

Solution 1

Firstly uninstall ATI Catalyst, this should remove all the drivers, and restart

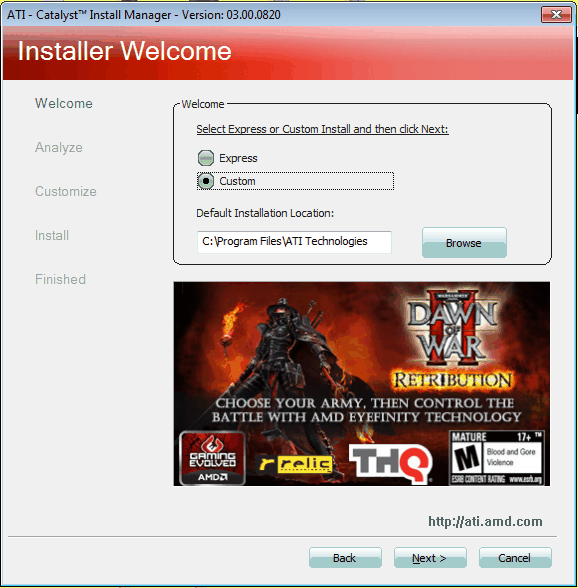
Next install a fresh copy of ATI Catalyst and use custom mode:

ATI installer screen

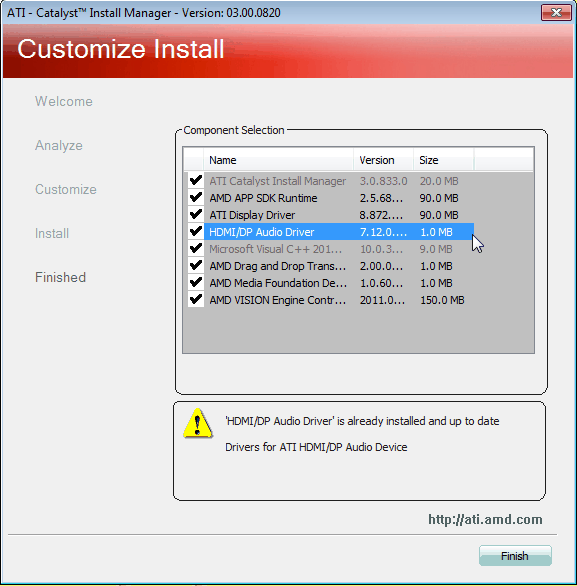
Then when given the option, deselect the HD audio, and complete the install:

Custom setup screen

This will make sure that the HD audio drivers will not cause a conflict.

Solution 2

Disable the ATI HDMI audio driver in device manager. This should have the same effect.

Go to device manager/sound video and game controllers/right click the ATI HDMI audio/ disable.

Final Thoughts

Just a quick word on BSOD they can be caused by many things, but the usual causes are drivers, more specifically Graphics and Sound card drivers. Other causes can be hard disk problems or RAM issues (rare -unless you just upgraded your RAM)

Graphics drivers are quite temperamental, if your graphics drivers work fine with the current drivers it does not necessarily mean it will work with newer, updated drivers, that is, sometimes driver updates can be worse; but usually these are fixed with future driver releases.

Posted in How to guides | 1 Comment

How to fix bios problems

So I was working on an old PC, (Motherboard: PC CHIPS m860 V1.0) trying to update the BIOS (Basic input/output system) with the manufacturers supplied software. However it failed and the net result was a corrupted bios. This meant that the computer couldn’t boot and also I couldn’t get into the BIOS setup.

Interestingly when a computer boots up, if it is failing on boot it will emit a few beeps to tell you what the problem is. As my bios was American Megatrends I searched for what the beeps meant. For a full list see:

http://www.ami.com/support/doc/AMIBIOS8_Checkpoint_and_Beep_Code_List_PUB.pdf

If that doesn’t help here are a few suggestions on what to do if your bios stops working:

1. Clear the CMOS.

The CMOS (Complementary metal–oxide–semiconductor) is the temporary stored settings for the BIOS, and the it can be reset to the the default settings. This will clear things such as time and date and BIOS passwords. This can be done 2 ways first is by using the CMOS jumper:

  • Turn off your PC and unplug it
  • Find the CMOS jumper on the motherboard it is usually located near the battery, it is usually labeled CLR, CLEAR, CMOS etc.
  • There are 3 pins for the CMOS jumper, simply remove the jumper and place it one across so it now covers the center pin and the opposite pin.
  • Leave it for 10 seconds. Then put it back to its original position.
  • CMOS should now be cleared.

CMOS Jumper

The second method is by removing the CMOS battery. It will do the same thing as the removing the jumper.

  • Turn off your PC and unplug it
  • Find the CMOS Battery
  • Remove the battery
  • Leave it for 10 seconds. Then put it back to its original position.
  • CMOS should now be cleared.

2. Try to restore the BIOS to its original state using a backup copy

After some research it became apparent that companies had thought of the issue of a corrupt BIOS. So here are a few methods you could try if your motherboard is American Megatrends:

Recovery from floppy:

  • Go to the motherboard manufacturers website and download a copy of the BIOS usually named xxxx.BIOS
  • Rename the file AMIBOOT.ROM
  • Copy the file to a floppy disk
  • Insert the floppy into the affected machine
  • Hold down <CTRL> and <Home> keys and switch on. Release the keys once the floppy light comes on.
  • After the floppy is read you should hear some beeps (usually 4), once they have finished it means the BIOS has been recovered. There may also be a progress dialog shown
  • The computer may restart by itself. If not manually restart.

Recovery from USB:

  • This is the same as the floppy method except using a USB stick, not all motherboards support this

Recovery from IDE CD-ROM

  • This is the same as the floppy method except using a CD, not all motherboards support this

Read more about these methods:

http://www.rom.by/files/AMIBIOS8-Flash-Recovery-Whitepaper.pdf

http://www.supermicro.com/manuals/other/AMI_BIOS_Recovery.pdf

Neither of these methods worked for me, so there was one final option:

3. Buy a replacement BIOS chip.

After some searching I found this website: http://www.bios-service-center.com/ . It specializes in replacement BIOS chips. So now all I needed to do was order the replacement. The PC chips M860 motherboard was listed on the site, so I ordered the chip required, and it was only £10 inc delivery. Bargain.

The next day I received an e-mail asking me for the exact BIOS serial number. So for this I had to located the BIOS chip and read the serial printed on it.

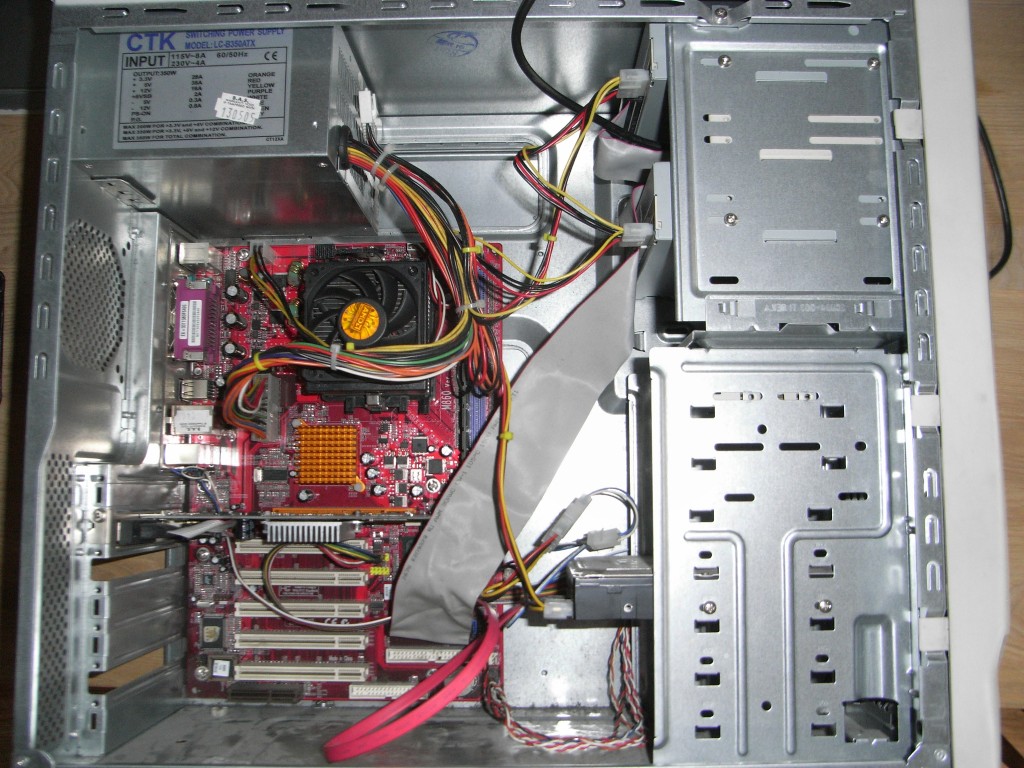
Here is a picture of the whole motherboard:

PC Chips M860 Full

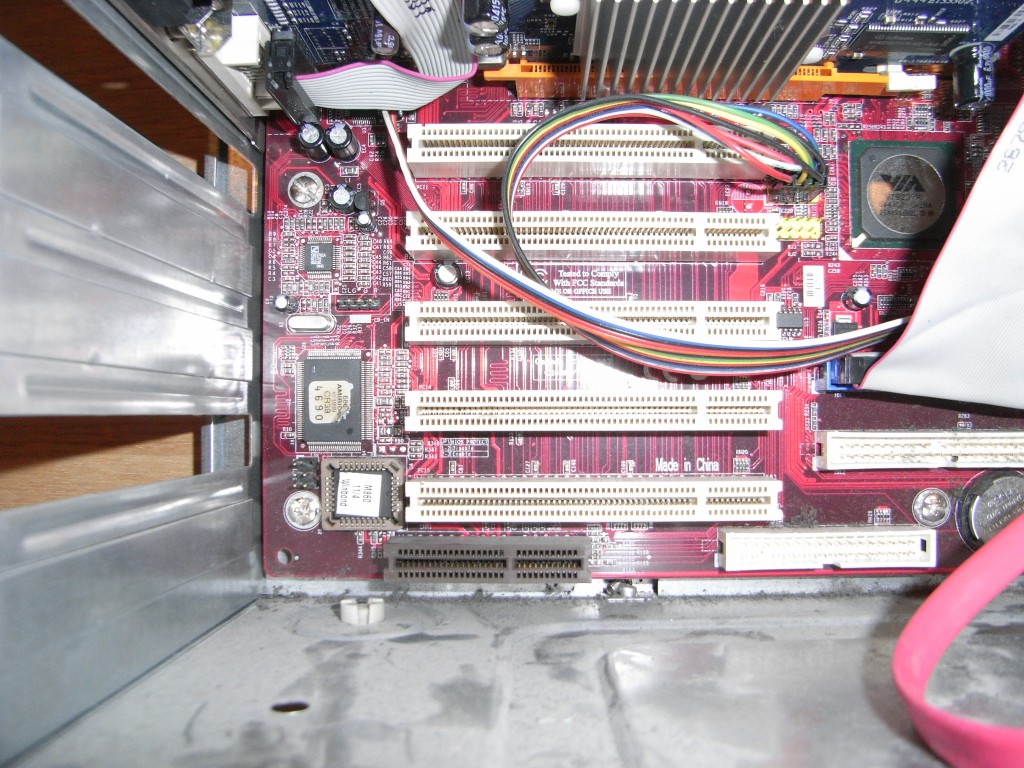
The BIOS chip is located bottom left of this picture. Here is a close up:

PC Chips M860 BIOS close

Here we can see the chip clearly in the bottom left corner (with the sticker stuck on wonky)

So after locating the BIOS chip I needed to remove it, now there are some special tools to remove BIOS chips, but I used a bent paper clip to hook it out (it was corrupted anyway). Please note you must turn the computer off and remove the CMOS battery BEFORE you remove the BIOS chip.

Once removed I peeled off the sticker to reveal the serial number and e-mailed the details over the the BIOS replacement website.

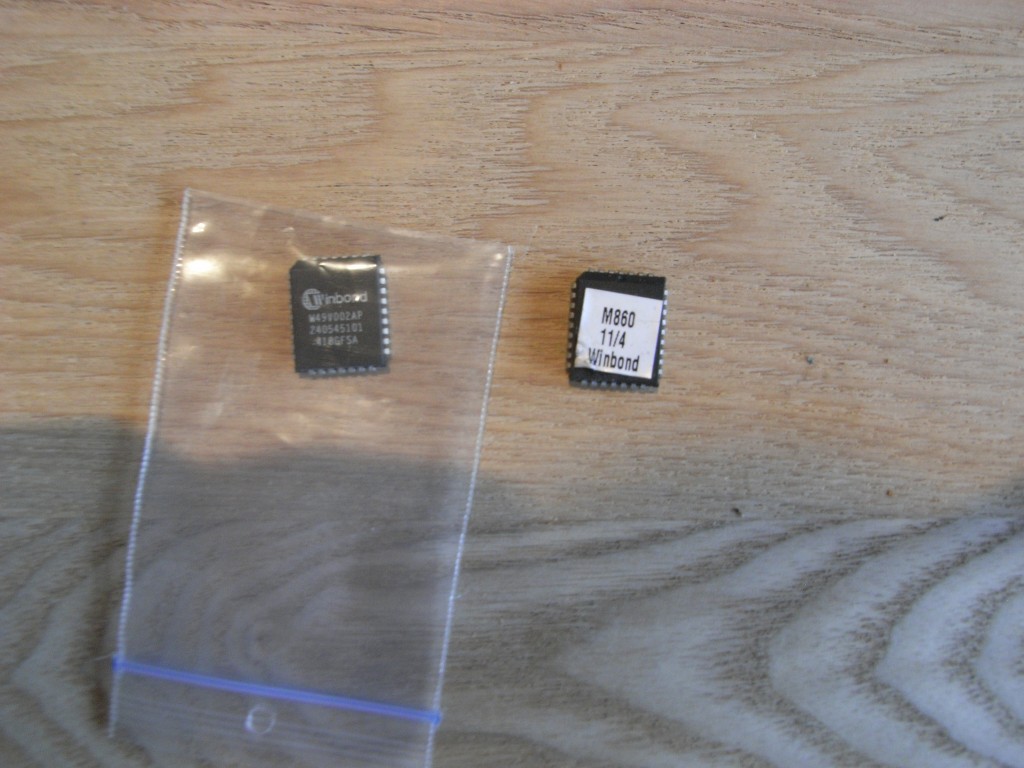
Within a few days the BIOS chip arrived, all the way from the Netherlands!

Old and new BIOS chips side by side

After installing the new BIOS chip the computer worked perfectly again.

Posted in How to guides | Leave a comment

How to solve XP Pro installation problems

Well, I know this blog be focusing on windows 7, but my friends laptop broke, and so I have spent 2 days trying to get it back up to speed. I’ll list the problems and fixes in order.

Problem 1: The first problem on the install was that the windows xp install CD did not recognise the hard disk.

Solution: This was due to a BIOS setting. Disabling AHCI, changing SATA mode from AHCI to ATA.
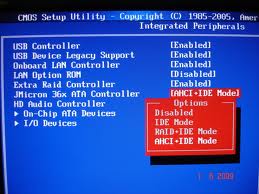
Option to change SATA mode / AHCI enable disable

The disk I used for the install was XP Pro Service pack 2. After letting the installation complete, I was faced with a screen:
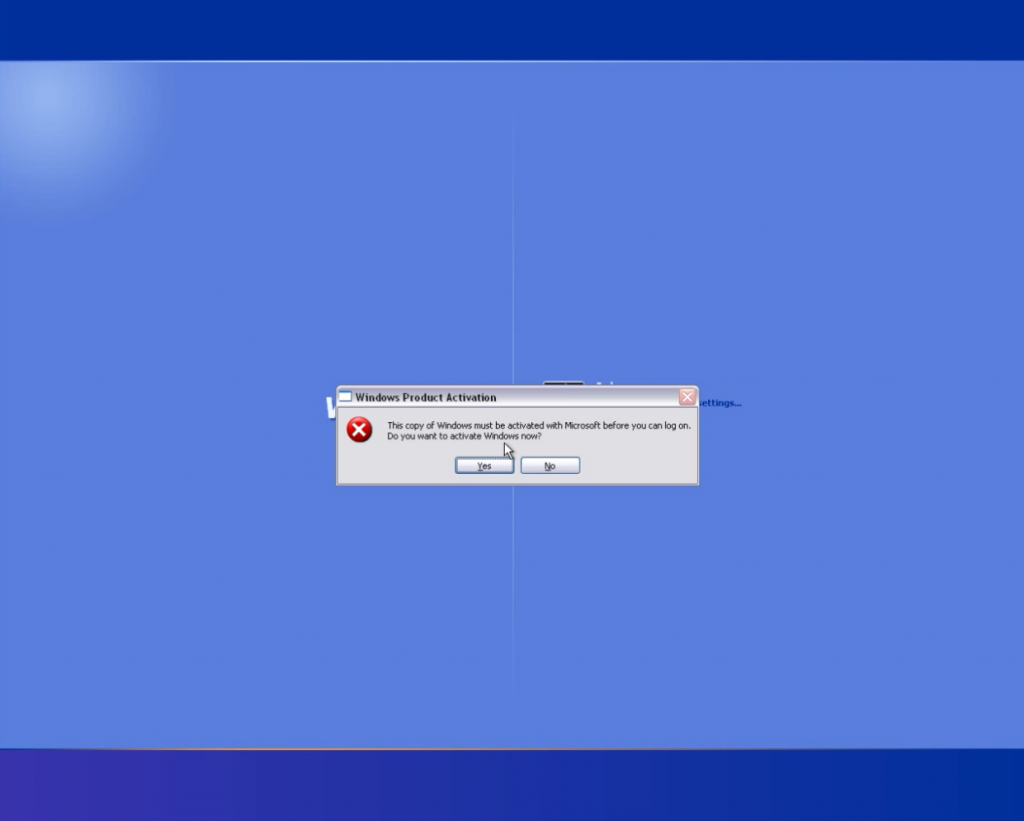
This is the activation screen found

The message reads: “This copy of windows must be activated with Microsoft before you can log on. Do you want to activate Windows now?”

Fine you might think, however when you click the option it gives you 2 options: first to activate over the internet and second by telephone. As I am not a fan of making more work for myself than necessary, I thought it best to go for activation over the internet. I was then met with another problem.

Problem 2: The drivers for the network card were not installed so it wasn’t possible to connect over the internet.

Solution: Track down the network card driver on the internet (in this case broadcom) on another computer, download it and put it on a pen drive or CD/DVD

Next reboot the computer into safe mode. Open device manager ( right click my computer, click hardware tab, device manager) and install the the network card driver.

This then allowed me to activate it online, however after activation, it comes back with the same screen and message when trying to logon, in effect it seemed to be caught in a loop.

Trying the second method, ringing Microsoft was then on the cards. Actually ringing Microsoft was fairly painless; from the actiavation screen, you choose your location and it gives you the number to call, in my case it was the United Kingdom.

Then after calling Microsoft, and selecting the correct option, you type on to your phone your unique XP generated code that appears on your activation screen:
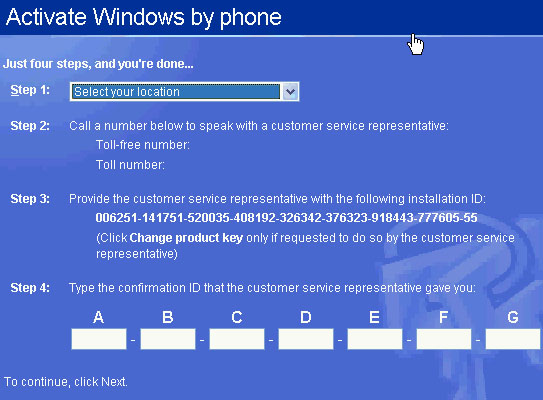
The code is unique to your install

Then there is a new code given to you by an automated female voice. After entering the new code, there was a message telling you activation was succesful. However it still didn’t allow me to logon.

Problem 3 : Windows caught in an activation loop.

Solution: Microsoft recommends you follow the following:  http://support.microsoft.com/kb/312295/en-us

However this didn’t work for me. Actually it turns out that the cause of this problem is internet explorer. The fix for me was to go back to windows safe mode and install XP service pack 3. After installing service pack 3, windows logged on as normal and I was able to load the rest of the drivers for the machine! Problem solved!

 

Posted in How to guides | 2 Comments

How to get an old Bluetooth device to work with Windows 7 or Vista (Nokia BH-505)

My brother bought me a bluetooth wireless headset for Christmas, a Nokia BH-505 to be exact. It worked fine connecting it to mobile devices, but I bought a bluetooth USB dongle for my computer (Avantalk BTDG-20). This came with a disk with bluetooth software called bluemanager. It connected my device but the music playback was truely awful. This was because the bluetooth software wasn’t quite compatible with the headset’s chipset.

Problem: Bluetooth headset wouldn’t stream music correctly.

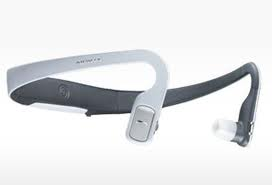
Nokia BH-505

So, the first thing I needed to do was find out what the chipset was on the headset. After a bit of searching in the web I found that it was the BlueCore2 chipset.(http://unusb.com/views/?NOKIA-BH-505-36873.html).

After searching BlueCore2 I found it was made by CSR (Cambridge Silicon Radio). However CSR don’t have a free bluetooth software program, so I needed to find software that supported the BlueCore2 chipset. There are a few bluetooth software programs around and they all are unique in what chipsets they support. The chipsets that bluetooth software support are contained in a bluetooth stack.

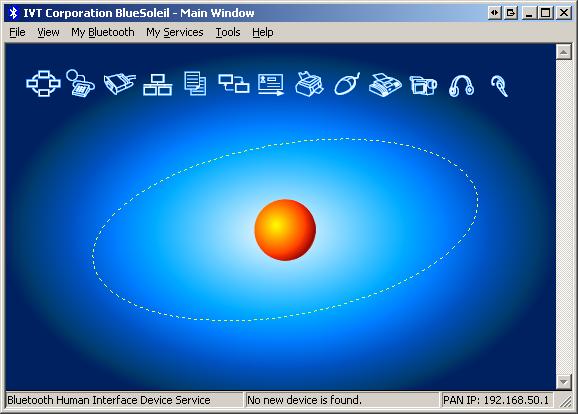
After several failed attempts to find a viable free driver source (and I mean many) the only one I had got it to work with was a program called IVT BlueSoleil, this had support for the the BlueCore2 chipset in the bluetooth stack. However the version I used was on a trial basis; you had to pay for the full version.

BlueSoleil Version 2.3

So it looked like I was stumpted however Avantalk had free downloads in the support section of thier website. And it just so happens they had an older version of BlueSoleil, with no limitations. After trying this version, it worked perfectly so I could use my bluetooth headset to listen to music wirelessly. Happy days!

Fix:

Posted in How to guides | 57 Comments

How to fix Screen flicker problem – XFX Radeon 5770

After spending over £100 pounds on a new XfX Radeon 5770 graphics card, I hoped I my computer would finally behave itself. However there was an issue with screen flicker. At first it seemed to be random, but after a while it became clear that Adobe flash player and Cyberlink Power DVD 9 player software.

Vertical lines can bee seen across the whole screen

It may not be clear from the picture, (as it is hard to get a good one) but if you look at the top of the image hopefully you can see the problem.

The solution to this problem was quite simple after some trial and error, I tracked the problem down to hardware acceleration.

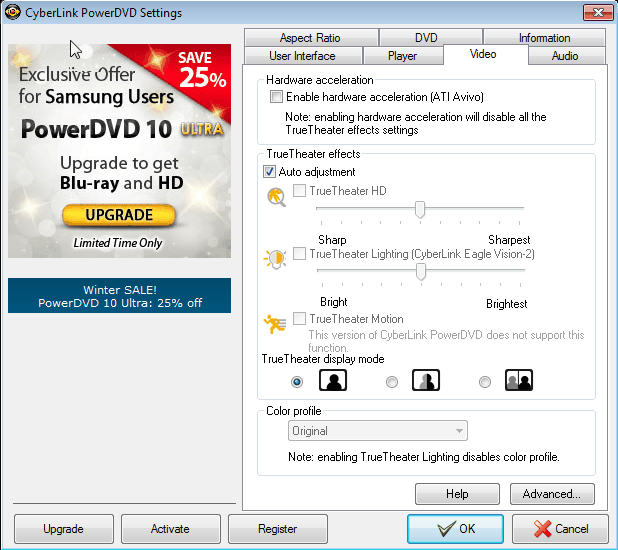
To fix this problem in Power DVD 9:

  • Open Power DVD
  • Click on settings:

  • Click on the video tab and then uncheck Enable hardware acceleration

  • Click OK and you are done!

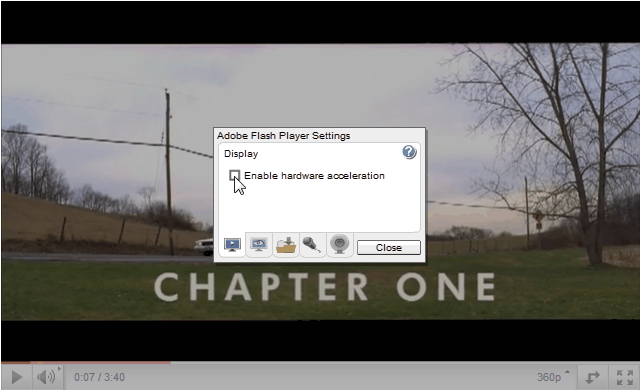
To fix this problem in Adobe flash player:

  • Go to a webpage using flash, i.e. you tube
  • Right click on the video and select ‘settings’
  • Uncheck the ‘enable hardware acceleration’ option and click close

  • You are done!

I hope this help people with vertical lines appearing on thier screens, its very annoying!

Posted in How to guides | 2 Comments

Anti-Viruses: One man’s story

When I bought my new PC back in January, it came bundled with Norton Anti-virus 2011. It was a 60 day trial, and worked perfectly fine.

Norton, tried and tested, but also a bit heavy.

We all know that free anti virus software is now available, but I was also given for free eScan Internet Securtiy Suite. It has mixed reviews on the web and as it was free to me, I decided to give it a whirl

One word: Avoid

That was one of the worst mistakes I have made. Avoid this product at all costs.

I don’t want to bore you will what it did to my computer, suffice to say it forced me to reinstall a lot software on my computer, and didn’t even have a log that told me it was interferring and deleting files on my computer that it shouldn’t.

I have used AVG successfully over the years and would recommend it to anyone, although the last time I tried it it wouldn’t run with Zone Alarm one of the best known free fire walls.

Very good anti-virus

The current antivirus I am using is also free: Avira AntiVir Personal.

Has found viruses other prodcuts have missed

It is the first time I have used this product and it has been fine to use. Whenever I get an antivirus, I update it with latest definaitions and run a full scan on all drives. This antivirus actually found 2 previously unfound virus/trojans on an external harddisk. Soo imediately it was in my good books. The unfortunate part about this product, even though it is free, has a nag screen that will pop up ever now and then. Which actually has the oposite effect; I wan’t to pay for it less.

There are of course other free antiviruses you can use such as Avast and Panda Cloud Antivirus. I have used both and they are both good anti-viruses.

As I update my website and blog you will find reviews for all the anti-viruses featured in the blog. Stayed tuned!

Posted in Advice | Leave a comment

How to get an old webcam to work with Windows 7 (D-link DSB C310 Windows 7 Driver OV519 Chipset)

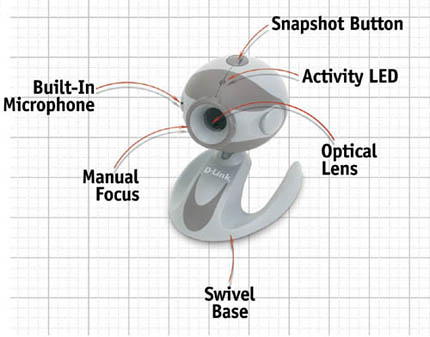
I recently bought a new computer, but I kept some of the bits from my old computer. One of these bits was a webcam I think I bought on 2003. The D-Link DSB-C310 PC Camera. Good for its time, and still works fine. However as it was designed for windows XP (a 32 bit operating system) the driver wouldn’t work for my new computer running Windows 7 (a 64 bit operating system)

D-link DSB-310 with component description

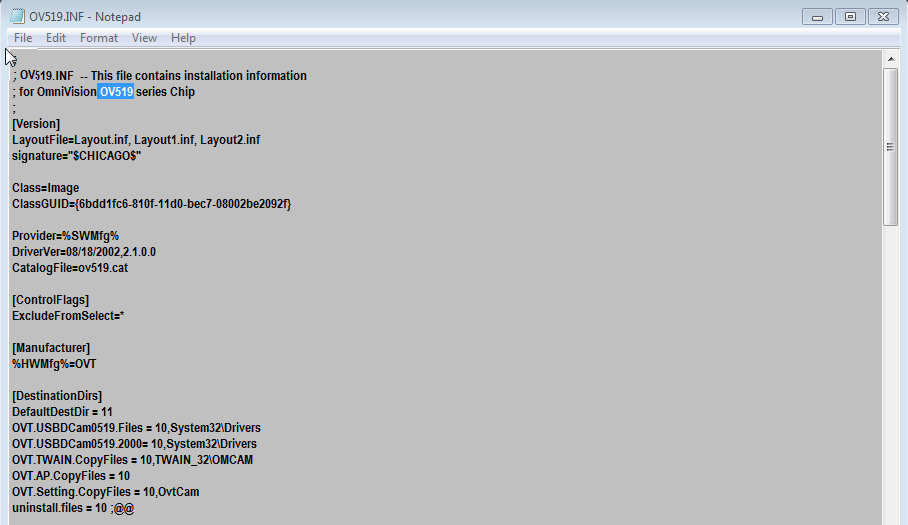
But I wasn’t going to give up and after a bit of research I found that certain web cameras and devices use the same video chip. In the DSB-310’s case its the OV519 chip. (OV stands for Omnivision) I found this by looking at the unpacked driver install files or the orignal 32 bit driver, here are the steps to finding the videochip for your webcam:
.
  1. Download the orginal driver
  2. Unzip / unpack files if necessary
  3. Look for a file named xxxxx.inf
  4. look in the file for the OV number in the file:

.inf file from orginal driver installation files

So the video chip for the DSB-C310 is OV519.
After some searching on the internet I was pointed in the direct of the Hercules Classic Webcam driver. This is a webcam that was made for XP and Vista, and as such has a 32 bit driver and a 64 bit driver, and it just so happens that the OV519 video chip is supported by the hercules classic driver. The hercules classic driver is actually designed for the OV530 chip, but is backwards compatible with the OV519.
.
After installing the hercules driver my D-Link DSB-310 started working again!
.
I hope this helps other in a similar situation.
.
You can download the driver direct from the manufacturer’s website:
Or you can download it direct from my blog:

For a more detailed walk-through of the install process please read the comments below.

Posted in How to guides | 62 Comments

How to cool your computer

When I first built my computer, I installed the power supply with the fan sucking air from the outside, into the power supply, then out the back. Because computer is housed in a SFF (Small Form Factor) case, it got hot rather quickly. Here is a picture of the case I use (Silverstone Sugo SG03B-F):

Silverstone Sugo SG03B-F

After turning the power supply or PSU (power supply unit) around, to suck air from inside the computer, and blow it out of the exhaust at the back;  there was a big difference!

Here we can see the flow of air on a PSU

Further cooling ideas.
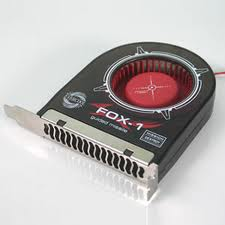
I also used a FOX-1 PCI Exhaust fan, which further cooled it. It is relatively quiet, although you can get quieter ones if you are prepared to pay the money.

FOX-1 PCI Slot Exhaust fan

Posted in How to guides | Leave a comment